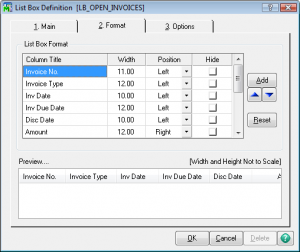
Over the years, many of our clients have come to us asking us to modify the layout of a standard grid. The most common grid to change is in Customer Maintenance and Inquiry on the Open Invoices tab. Where this once required a modification to the source code, it can now be modified using the Custom Office capabilities of MAS 90 and MAS 200.
In this example, we will modify the Invoices Tab in Customer inquiry to move the Customer Purchase Order Number just to the right of our Invoice Type column.
- Go to Modules > Accounts Receivable > Main > Customer Inquiry.
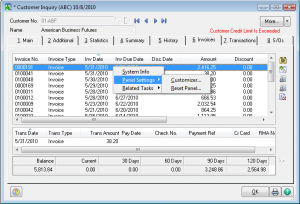
- Click on the the Invoices Tab (Tab 6).
- Right click and choose Panel Settings > Customizer (Please Note: You must have access to the Custom Office Module via Security).
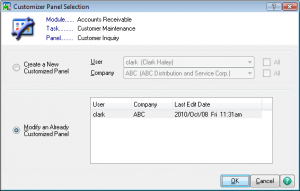
- Click “Create New Customized Panel and select the User (or security group) and company that you want to have access to this customization. Click OK to advance to the next screen. Note: If you select “All” for the User and Company, every user will see the same customized form.
About the Tips & Tricks Series
BCS ProSoft is proud to offer you these Tips & Tricks for MAS 90 and MAS 200. These tips were drawn from our extensive technical support knowledge base as well as from the comprehensive experience or our team. Each tip is outlined in detail, including pictures and or drawings where appropriate. There are a couple of things to note in order to use these tips effectively. All tips are written for Sage MAS 90 and Sage MAS 200 versions 4.1 and higher. Some tips should be used with great care and caution. If you are ever in any doubt as to how to use the information provided, please contact our Award Winning Support Center. Click here for options on contacting our Support Center.
| View Other Tips & Tricks | Follow Us on Twitter | ||
| Join us on Linked-In |  |
Subscribe to our Feed |
About the Author
Julie Marcie is a Senior Support Specialist at BCS ProSoft. She has been helping businesses keep their software running for the last 20 years and has specifically been supporting accounting systems since 1985. She is married with 2 grown children and one grandchild. She and her husband, Frank, recently purchased 10 acres of land near Seguin, Texas and are preparing to build a Geodesic Dome Home.
Julie’s support advice for her customers? “When you call me for support, just take a deep breath, relax, and be confident that we will work through the issue(s) together!”

